Sunday, 1 April 2012

Stairway to Heaven

If you recall Kelly Gardens is very hilly.  The previous owner was either a bit handy or bit parsimonious, or perhaps a bit of both.  He built lots of things out of scraps that he had probably gotten free. There are benches, stairs and bridges, all of which are in various states of decay.

In the above photo, you can see some benches he made from two cinder blocks with a piece of lumber fastened across the top. He placed 3 of these lovely seats around a fire pit.  The lumber has rotted a bit (not surprisingly since they are probably 25 years old) but they still work, and we moved one of them to overlook the lake. Behind the bench, you can just see one of his staircases in the distance.

A closer look at the staircase from the picture above. As you can see, he just sawed lengths of railway tie and nailed them to strips of wood. You can just see at the bottom the wood has snapped.  They don't look very safe do they?  David tried to fix them, but I don't think they're much better as they aren't even, and as there's no hand rail they are not easy to negotiate. It is remarkably hard to make stairs.

David tries out the new stairs. They certainly look better!
These stairs go down to a little valley that we call the Deer Run (yes, I know I've still got to get that map posted so you can see where all these places are.)  At the top of this set of stairs is a smaller set which are constantly in the shade and have been come beautifully covered in moss.

Notice the little fern that's seeded itself in the gap between steps
This is a delightful location for a planting. We decided that this Japanese Forest Grass, Hakonechloa macra aureola would look splendid here as it tolerates the shade. We ended up planting 3 plants here but only 2 have survived.  Hopefully, as they get older, this grass will end up having a waterfall effect edging the stairs.

To be continued...

Thursday, 29 March 2012

Stop the Presses!

I was searching for photos for the next blog post and what do you think I found?  A picture of the birch that had been gnawed by the beaver and finally fell on the Iris.

the birch is on the far left and the you can just about see the beaver damage at the base.
It still amazes me that the birch fell, but perhaps it was helped by a deer or bear!

Monday, 26 March 2012

Canada Blooms 2012

March means Canada Blooms, a perennial favorite of the Kelly Gardeners. It is an annual garden show hosted by The Garden Club of Toronto and Landscape Ontario.  After a long hard Toronto winter, Canada Blooms is always a welcome treat, and it heralds the many joys of a new growing season.

Ahhh, those were the days when the show was held in the depths of the Convention Centre on the South side of the railway tracks. As you came through the entrance doors the smell of Spring flowers literally assaulted your senses.  And the excitement just seemed to mount as you descended down the 2 flights of escalators to the entrance to the show.  Finally through the doors and you were swept away by the exhibits.  There were feature gardens by professional landscapers; exhibits of the latest trends in plants; booths set up by Professional Organizations and Societies of all kinds; Canada's largest floral competition; talks by professionals and a market place where you could shop till you dropped.  Over the years, the show got bigger and bigger. By the time you finished the show, you just wanted to put your feet up and have a nice cup of tea.

In 2010 the show moved locations to the Direct Energy Centre at Exhibition Place. It's not the same. The biggest difference is the smell. You just don't get the same blast of scent when you walk through the doors. And this year Canada Blooms amalgamated with the National Home Show, and it is now one MEGA show, at least four times bigger and lasting twice as long. Of course this means that some of the smaller merchandisers just can't come. Ten days is a long time to commit to a show. And it's really hard for the floral competitions as it is a bit of stretch for cut flower arrangements to look good for10 days.


In the past, there were many feature gardens built by larger professional landscapers who created spaces suitable for outdoor entertaining. This could include a dining area; a lounging area, often complete with flat screen TV or fireplace; or perhaps a kitchen or bar.  This is great if you have no bugs, and is certainly interesting and something that one could aspire to, but is definintely not "must have" for the Kelly Gardeners.

This year there were fewer such large, ostentatious displays.Here's my favorite for its elegant simplicity.
"Dinner Party" by Allweather Landscape Co.

One of my favorites this year was the "International Garden of Taipei, Taiwan" garden by Ron Holbrook. Unfortunately, I'm limited to uploading Youtube videos, so if you want to see some videos of the Taipei garden please visit the following links:http://vimeo.com/38699636
http://www.stylegui.de/newcacom/newca-com-taipei-garden-at-2012-canada-blooms-6036814

The garden was chock full of orchids and also featured the "must have" plant of the year:


Medinilla magnifica a native of the Phillipines
What I liked the best was the clever use of boxwoods to emulate tea plantations, seen here planted with phalaenopsis set out like bedding plants!

There were also a number of incredibly creative gardens. My favorite was the Reford Gardens feature garden, Surface Deep by Asensio Mah, which won the prize for the most imaginative garden at the show. 
Surface Deep

And then there are the themed gardens that I don't quite get the point of. This year's was the Juno Rocks gardens:  four gardens inspired by Juno Award winning performers. Perhaps if I was actually familiar with these performers' work, I would have appreciated the gardens more.

We did have fun though. We met Becky Fox (the Editor of Garden Making) again, and once more we were struck by how wonderfully genuine and self-effacing she is.  We had watched her latest video the night before and we told her what a lovely job she had done introducing the 15 new and noteworthy plants that were featured at the Garden Making Booth. She was touched by our praise as she doesn't find making videos easy.  If you want to see for yourself, visit www.gardenmaking.com and you can watch the video and see the booth.
Garden Making Booth at Canada Blooms

But the real highlight of the show for me was the Rose Garden ...  make that 2 rose gardens.  Very simply 2 fifteen foot square beds, crammed full of roses! Mmmmm, wonderful.

Roses in March!
I really love roses. Even though they are too fussy for our climate and they are a magnet for all kinds of pests and diseases, nevertheless, there's something magical and deeply romantic about the rose. And they beg you to stop and smell them. I do hope we'll be able to grow roses on our lot.

So, why do we go to Canada Blooms (especially now the tickets are $20)?  I don't know. Perhaps it is because after a long hard winter, we are anxious to experience a bit of Spring. Perhaps we hope to be inspired by new ideas. Every year we say we won't go again next year. But every year we do.  The count down begins.... Dare I say that I'm looking forward to Canada Blooms 2013 as a welcome harbinger of Spring.


Wednesday, 22 February 2012

"Colours are the smiles of nature." Leigh Hunt

It was a nice treat to see the Gervase Amaryllis sending out a second flower scape. It was doing very nicely and growing quite tall (Gervase has a 2.5 to 3 foot stalk).  Then one morning I went to look at it, and the stalk had fallen to one side and cracked right across the base!  There was nothing for it but to detach it and treat it like a cut flower.

I filled a vase with some warm water and flower preservative, then re-cut the stem to a better length. Next, I inverted the flower and filled the hollow stem with water. I plugged the hole with my thumb and quickly re-inverted it into the water in the vase. If that is a bit tricky for you to do, you can always fill the stem with water and them plug it with a cotton ball. This helps against the dreaded air bubble in the stem which prevents the flower from drawing up water.

Hopefully, the flower would now have a chance to fulfill it's potential.  It had 5 buds, and when it bloomed it had a real surprise for us!

Remember that Gervase is a lovely red and white candy-striped Amaryllis.


 But the next bud was totally red (bottom right).

And then in between was a bloom that was half red and half striped!


So there are 2 solid red blooms, 2 red and white striped blooms and 1 half and half!

And to cap it all, the bottom of the cut stem decided to go rococo on me.


David and I have been very entertained by this antics of this plant.

Photo Credits:  David Kelly

Monday, 20 February 2012

Look what’s blooming in my house this week.


I promised to let you know when the other Amaryllis bloomed and bloom it most certainly has. It was labeled correctly and it has turned out to be Gervase. 

 
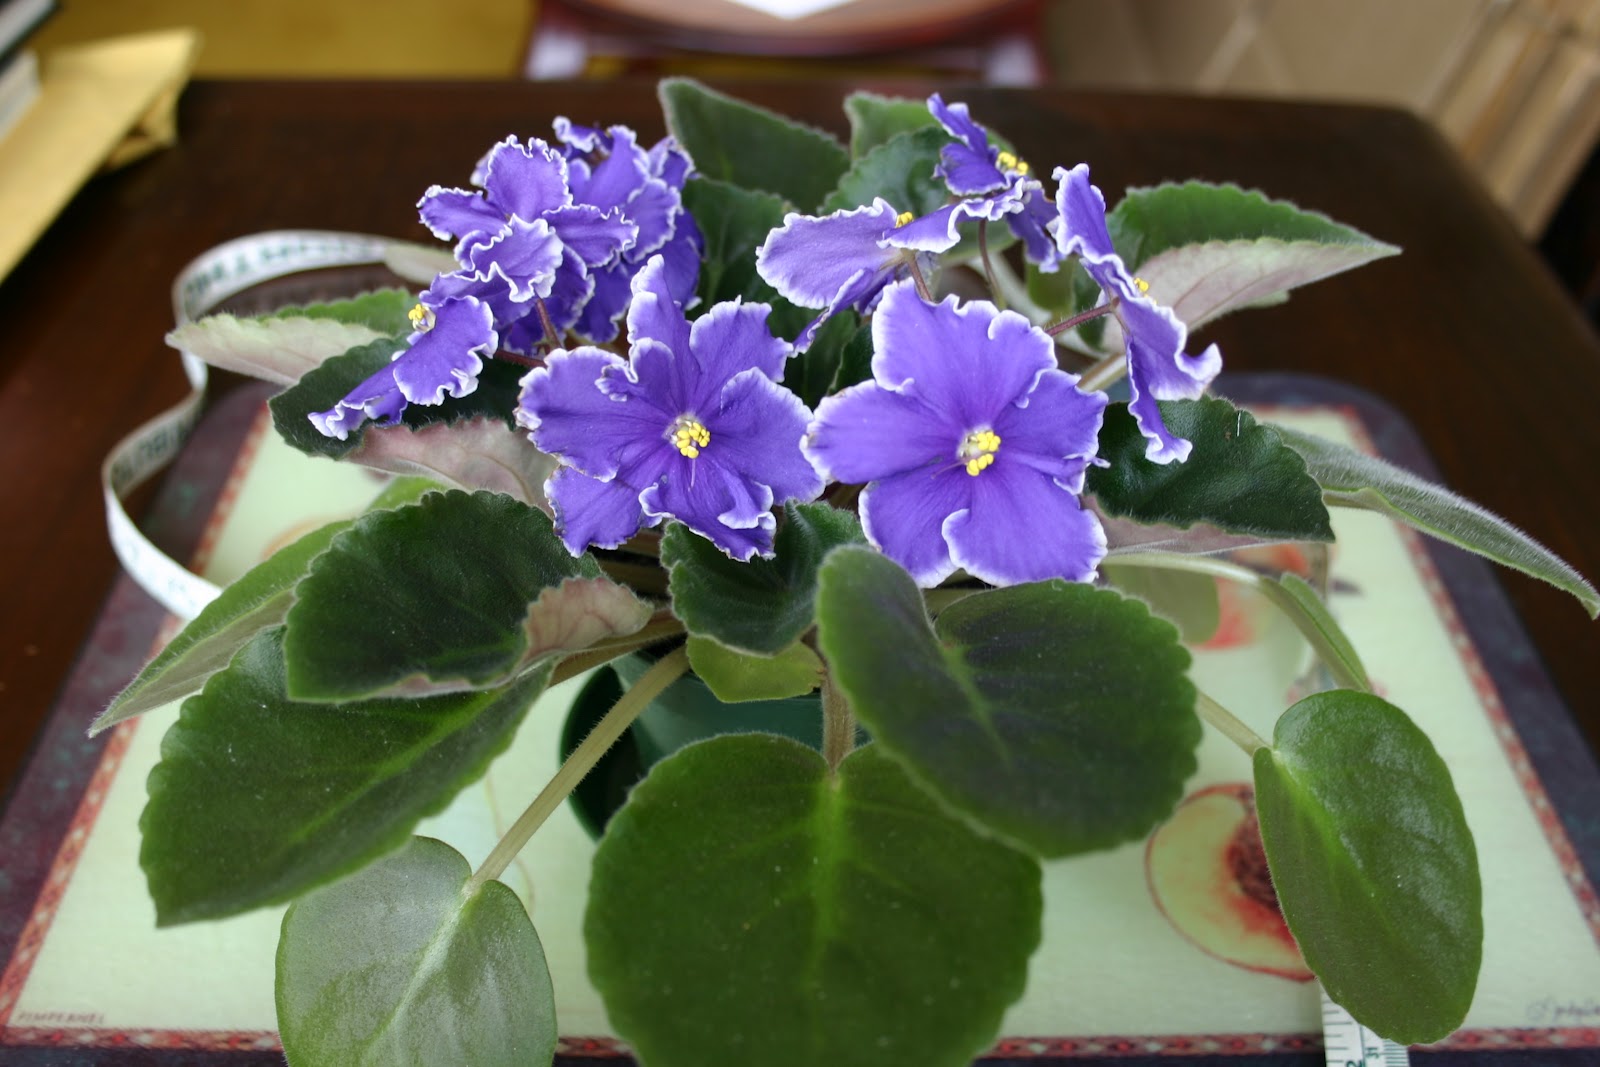
I wanted to show off a few of my other plants that are blooming right now.  The first is a particularly fine example of the humble African Violet, or Saintpaulia.  African Violets are easy to propagate and fairly easy to grow (once you figure out that they don’t like getting their leaves wet, and so they should be watered from below).  African Violets  are commonly available and inexpensive, so are often thrown away when they’ve finished blooming.  Although common, it isn’t easy to find named varieties of African Violets unless you buy from collectors.

We bought this African Violet from a specialty vendor at Canada Blooms one year. I actually bought it as a present for a friend and stole a leaf so I could grow one for myself.  I remember waiting for the bus after the show and a lady in the line-up asked me why I was wasting my money buying expensive African Violets from the show, when I could get them more cheaply at the grocery store. I didn’t want to waste my time arguing with the woman, she had obviously made up her mind, but the reason why I bought this (and other African Violets) from specialty vendors is because they are special. They seem to flower for much longer periods and the flowers are outstanding. This one has huge purple flowers with white frilly edges. What do I mean by huge?  Look at this.
Two and a half inch flowers!
 
And finally orchids.  Who can resist the lure of the Phalaenopsis or moth orchid. They are now so common and so cheap that they’ve become throw away plants too.  It is tricky to get them to bloom again and over the years I have resisted the temptation to buy orchids because I  just couldn't seem make them re-bloom.  Last year my best friend gave me a lovely little orchid and this time I was determined to try to make it re-flower.  I took the advice of Ed Lawrence, who does the gardening phone-in show every Monday at 12:30 p.m. on CBC Radio 1, who explained how to make the moth orchid re-bloom.  It has a lot to do with light levels, but more importantly you need to give a period (I think about a month will do it) where there is a 10 degree difference in temperature between day and night. I guess that is to simulate what happens in the jungle where they are native.  Ed then explained that one trick to achieving this is to water the orchid by placing ice cubes on their roots. Apparently the icy water is enough to create the temperature difference.

And it worked!  Look at this. 

 Apparently, this only applies to the moth orchid. I hope this wasn't a fluke as I bought myself another orchid last week! I'll let you know how it goes.

Friday, 17 February 2012

If a tree falls in the forest … Part 3. Where does it land?

Choosing plants that will be happy despite neglect, lack of irrigation and animals that would love to have a salad bar grown for their delight is quite a challenge.  One clue as to which plants may do well is to look at what is already growing on your land. 

I am incredibly lucky as there are a variety of habitats on my lot. Broadly speaking, there is the land, the water and the water’s edge – which is sort of in-between.  Wetlands are extremely important to the ecosystem. They are nature’s septic systems, and their job is to catch and filter the water of its impurities before it goes into our lakes and streams.  Fortunately we are beginning to understand the importance of these environmentally and are nurturing them.

One of the loveliest of flowers that thrives on the water’s edge is the Iris versicolor or the blue flag Iris.

Beautiful Iris versicolor at Purdon Conservation Area. They are living in a fen, which differs from a bog as it has water running through it rather than sitting (stagnant).
Further investigation showed that Iris are not a tasty treat for deer so when we came across this Iris siberica "Contrast in Styles" at Burts greenhouse in Odessa, we splurged. 


We knew that this beauty was a marginal and would be happiest in a wetland setting. And as we would not be around to nurture it, we needed to make sure it was sheltered, so we decided to plant it in the wetland between the large island and mainland in a part of the lot we call the Deer Run (I will be uploading a map soon so you can see where all these places are). David cleared a space for it and it was lovingly planted. I whispered a few words of encouragement to it to help it on its way and then we went away for a week, hoping that our lovely Iris would be happy in its new home.

When we came back, this is what we found…

The tree which fell in the forest landed on our newly planted Iris!!!

OK, I know it’s taken a long time to get to the punch line, but I’ve enjoyed the journey, and I hope you have too.

P.S. I’m not sure what has happened to the Iris. We look every time we go, but we can’t say for sure where we planted it (of course we didn't label it) and there are a lot of grassy type plants where it might be. The tree’s still there though…. And my guess is that it will be there for a while.

Wednesday, 25 January 2012

"What's in a name? That which we call a rose by any other name would smell as sweet." William Shakespeare.

Actually names are very important, especially the names of plants.  And plants are really special, as they can have more than one name: the common name or nickname, and the scientific name, which is Latin, hard to pronounce, impossible to spell and usually written in italics.  (Don’t worry, I’m going to spare you the taxonomy lesson, but I promise I will get to it soon!)

It is however, really important to know the scientific name of a plant.  How can you covet a plant properly if you don’t even know its name?  Ironically, in all our visits to gardens over the years, we seldom found one that consistently had labels on the plants.  And, a little secret, if you happen to be doing a garden tour and want to know if that proud owner is actually a gardener, or has just paid someone to do it for them, ask the name of a plant. A true gardener will know what it is, because it was probably chosen with care.

Plants are usually labeled in nurseries and garden centres, and they can be mislabeled. (How easy is it for the tag to fall out of the pot and some well meaning person put it back … in the wrong pot!), and sometimes in the fall you can get a bargain on a plant that has lost its label. 

If you want to find really good examples of plant labeling, you will have to go to a public gardens, green house or arboretum.  They consistently label their plants and they often do it well. It’s a good thing they do, as they are the main source of our knowledge and inspiration.
Montreal Botanical Garden. This is a superb example of plant tagging. At the bottom we have a metal inventory tag. There are 2 numbers on the top. I think the first is an inventory number and the second the year of planting. It is followed by the scientific name of the plant. The tag is probably made from aluminum which is stamped. This tag will last forever! At the top we have the specimen label which has the common name (in English and French), followed by the scientific name and the native habitat.

Why don’t more people label their plants?  Let’s not get into a philosophical discussion on motivation here, but look, instead, at practicalities.  There aren’t a lot of alternatives on the market.  Here are a few choices.

Popsicle sticks and a Sharpie (or substitute any kind of cheap flat surface-wood, plastic, and marking implement)
Pros: Cheap. Practical. Easy to do.
Cons: Looks cheap. Wood rots. Writing can come off. Plastic gets brittle and breaks. Stick can get lost.
Conclusion:  Probably only good for short term use. Seedlings, annuals, or vegetables.
Scotts Lavender Farm. Cobourg. This is a "high-end" example of the popsicle stick. Very lovely. I'm not very artistic, but I might be inspired to give it a try!
This is a very, very cheap label. Just a bit of plastic marked with pencil. It's probably ok for the pot, but I think we need to replace this soon, before we lose it and can't identify the plant!

The label that came with the plant.
Pros:  Doesn’t cost anything. Doesn’t require any effort.
Cons: Takes up a lot of room. Not all plants come with nice labels.  The label then can’t be used to catalogue your plant.  You can’t add any information, like date of purchase.
Conclusion: An adequate solution, but not perfect.
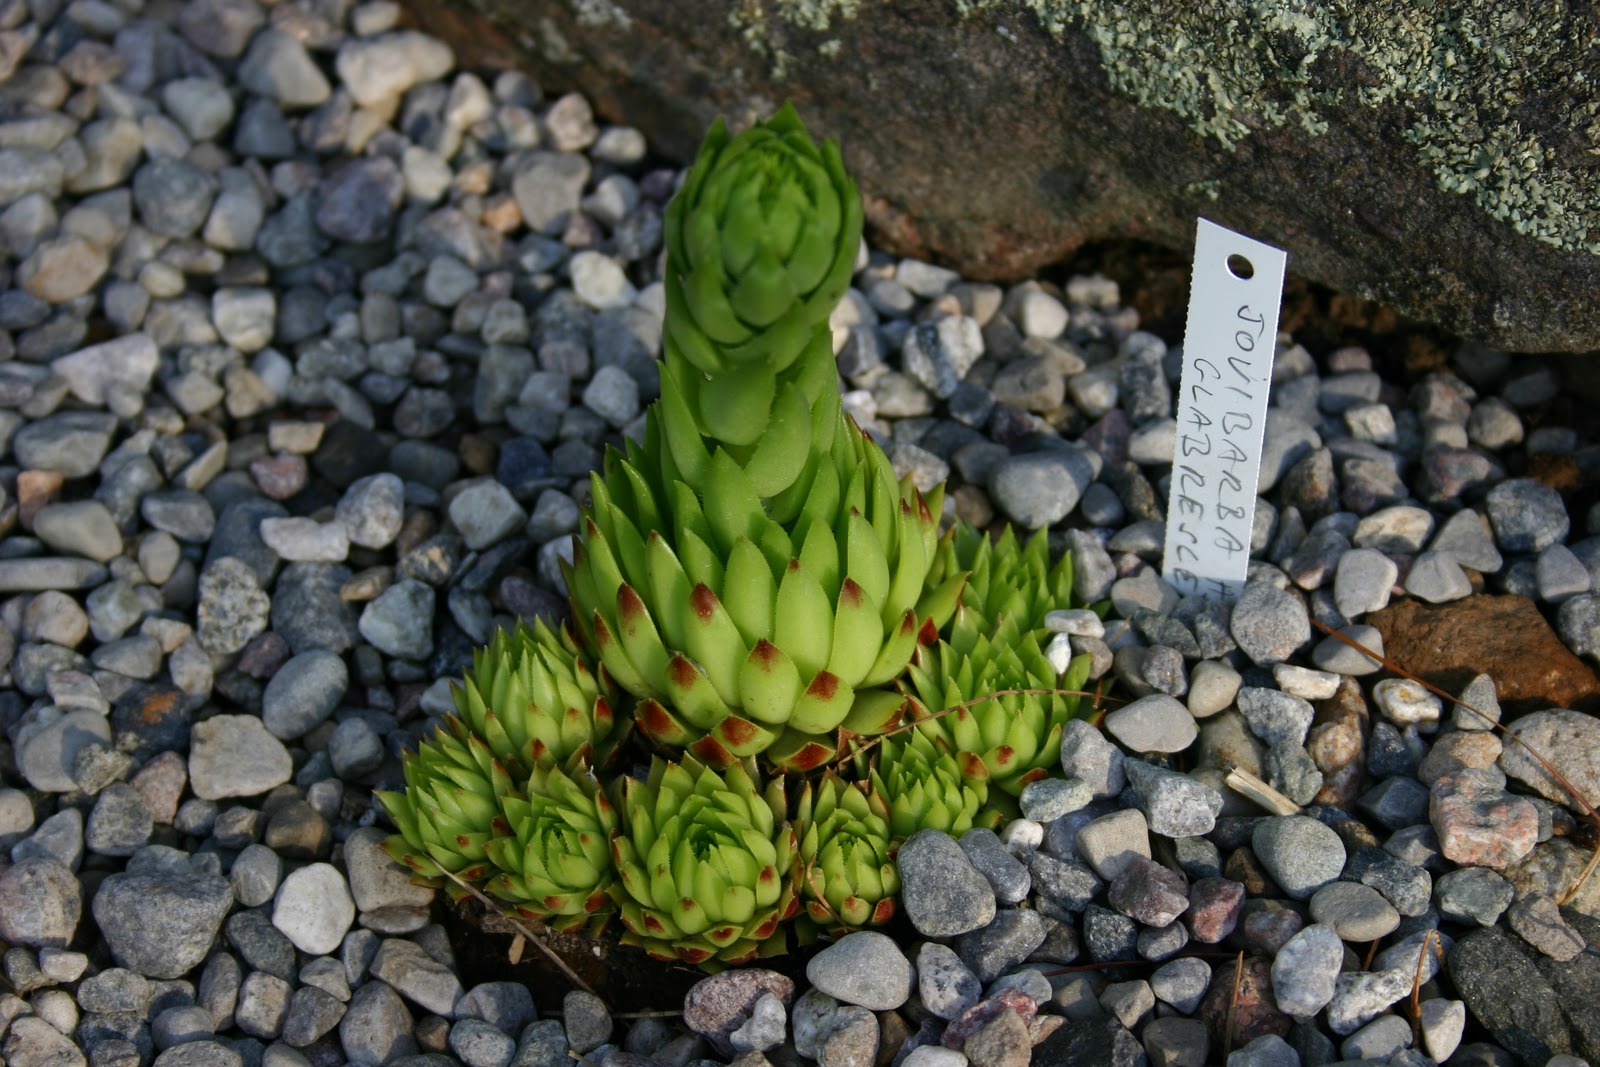
This is a perfect example of sloppy labeling.  I have the label for the sempervivum in the pot above. But I don't know which plant it belongs to. Part of the problem is we bought many sempervivums over the years and they change so much depending on their age and the season, that we can't match the plant with the label now. That'll teach us.  The stone crop didn't make it through the first winter. But we still have the label!

Metal Window blinds.
Pros: Environmentally friendly if using recycled blinds. Can be written on or have labels stuck on.
Cons:  Space isn’t really very large and you have to get waterproof labels.
Conclusion:  For smaller plants it’s probably a very good solution, but they’d look lost under a tree.
This lovely little alpine is from Judy Wall's Nursery - Rock Wall Gardens in Perth, Ontario. She uses recycled blinds to label her plants.

Recycled aluminum pop cans. (Apparently you can cut them up and use a pointy stick to engrave on them!)
Pros: Cheap, environmentally friendly.
Cons:  Sucks if you don’t drink pop! But you can always raid a recycling bin. Not sure how practical they are as I’ve not tried it.
Conclusion: It may be worth a try. Heck, its recycling… if it doesn’t work you can’t really lose!

Purchased labels.
Pros:  Look professional. Last a long time. Come in lots of different sizes and materials, copper, aluminum, ceramic, etc.
Cons:  They can be expensive.
Conclusion:  Not a lot of selection out there.

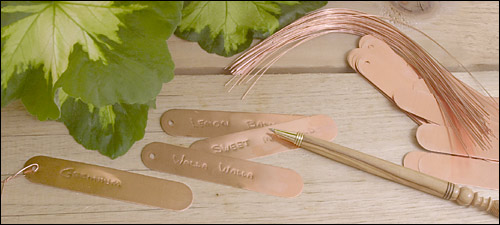
Below are a  selection of lovely plant markers from Lee Valley Tools.
Large Aluminium markers with lots of room to write on. 
Plastic labels with copper or aluminum insets.

Copper tags. These are truly enviable, but copper's so valuable I'd be worried that someone might steal them for their scrap value


We have decided we are going to attempt to label our plants.  But you’ll have to stay tuned to see what we decided to do.