Showing posts with label Kelly Gardens. Show all posts

Tuesday, 10 September 2013

Gardening Hiatus

As you may gather from the title of this post, the Kelly Gardeners have decided that 2013 will be a fallow year for gardening.

What? I can't believe I just said that. Why ever not?

Firstly, after our first visit this year at the end of April, I (in particular) was very disheartened at the amount of damage the deer had done over the winter. In fact, many of the plants that had survived the first winter, had not survived the second.  There's a great deal of emotional impact in seeing our very carefully selected, planted and nurtured plants decimated by a few seconds of indiscriminate chomping. We spent much in the way of time on our new "babies", not to mention the expense of purchasing them. Obviously, not being present for extend periods doesn't help.  Hence we have decided that it is probably more circumspect to have a suspension on new garden purchases for this year, though we will probably weed and cultivate.

Secondly, because we are extremely busy this year with the building of our new home! It now takes up 90% of our non-work related energy and has done so throughout the summer. Thank goodness we are busy, or gardening withdrawal symptoms might threaten my sanity.

Life without gardening is still a barren place, notwithstanding the enormous drain on energy that the learning curve of house construction has been.  My indoor garden is doing well, despite the strange infestations that occur, and I've managed to keep new acquisitions to a minimum at the same time as actually discarding some plants that are past their best.  Still, it's not the same as being outside and getting my hands in the soil.

So ... how have we managed to stay sane?  By watching Gardening shows online.  To be more specific, we've discovered that we can watch some pretty wonderful gardening shows that have been uploaded to the video sharing website, Youtube.  I have no idea how some people have the time, nor the data capacity to upload the hours of video that they do, but I must confess, I'm grateful to them.

We started off with Around the World in 80 Gardens with Monty Don, a well-known gardening person in the UK. This series is in 10 parts.  Gardening personality - Monty Don - visits 80 gardens in different parts of the world.  Part travelogue, part adventure, it is a deeply personal journey that Monty Don makes, which challenges his very conception of what a garden is.  My favorite episode was about India. I was very surprised, as I thought it would be about China and Japan, given my predilection for Japanese gardens, but I confess I found them a bit sterile and undelightful.


Here's a link to watch a preview of Around the World in 80 Gardens. Perhaps it will inspire you to watch more.

So, where to next? We really liked Monty Don and a quick investigation revealed that he was quite a TV personality in the UK. So we settled in to some more armchair travelling, this time to Italy.  Monty Don's Italian Gardens chronicles the history of Italian Gardens from the Renaissance through to the 20th century, and also traverses Italy geographically, visiting Rome, Florence, Naples and the North ... the Venato and Lake Como. I've watched some of the parts more than once. They are packed with information, not only about the gardens, but about the history behind their making, and although I'm not historical inclined, they are a fascinating chronicle.

Here's a link to a Preview of Monty Don's Italian Gardens

Monty Don has made quite a few series for British Television, and we have immersed ourselves in his visit to France; his kitchen garden series Fork to Table, where he grows vegetables and then cooks and eats them; and then to bring us right up to date, the venerable iconic British gardening show Gardeners' World.

There are other wonderful gardening shows which have distracted us from the real thing.  Here are a few of my favorites.
  •  Peter Thoday and Harry Dodson recreated the garden at Chilton in the superb Victorian Kitchen Garden (which I remember watching in the '80's when it was first broadcast). 
  • Carol Klien (another host of Gardeners' World) shows us her garden at Glebe Cottage in Life in Cottage Garden. 
  • Alan Titchmarsh chronicles the history of some of Britain's most well know gardens from the 17th to the 20th Century in Garden Secrets.

Is this vicarious form of gardening a satisfactory substitute?  Well, I've been amazed at how "serious" gardening is as a hobby in Great Britain, and how enthusiastic the gardeners are. I've also learned some very valuable lessons from the history books. It's certainly not a substitute for the real thing, but I must admit to have enjoyed the distraction.


Sunday, 30 September 2012

Garden Ornament

I hazard a guess that garden ornament has been around as long as gardens themselves.  The ornaments can serve to enhance a garden's beauty and add interest.

Just about anything goes, from formal, classical statuary on a grand and magnificent scale, to tiniest found object; from vast extravagent neo-classical grottos carved from the side of hillsides to old rusted tools from a by-gone age.
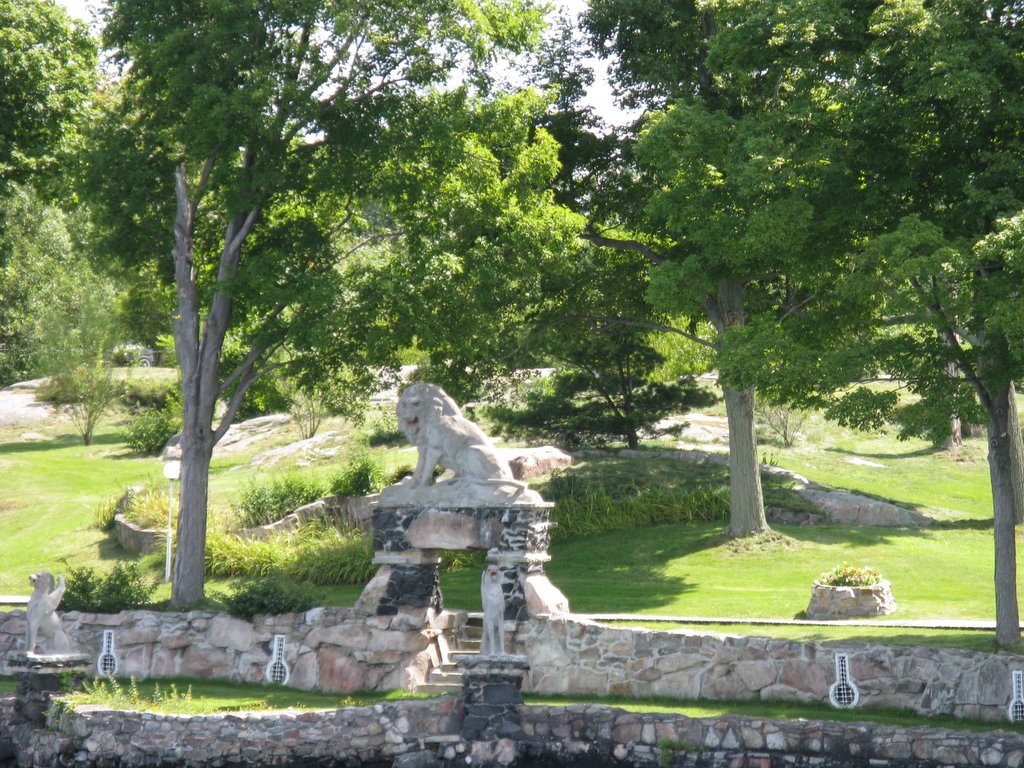
Classical Statuary on a grand scale. Here's a formidable guardian of the garden. Boldt Castle, 1000 Islands
Another example of classical statuary on a grand scale. Though not to everyone's taste, there's no denying how tasteful these three beauties are. From a veritable mansion in Toronto.
And a third example, of classical statuary on a grand scale. Once again, a truly magnificent example of garden ornament, this time incorporating the statuary with a water feature. How envious I am! IBID
This beautiful little statue, sitting quitely amongst the wisteria and sweet woodruff, is proof that you don't have to go big to have an impact. From a private oasis on Ward's Island, Toronto.
OK, perhaps a little too large and strange for an your ordinary garden, but you've got to admit it does add interest! From the grounds of the now defunct Fifth Town Cheesery, Prince Edward County
Simple and extremely tasteful. From an estate in Etobicoke.
One of my favorites. The juxaposition of this pendulous spruce against the verticles of the fencing is enhanced by the circular "window" cut in it.  The circular form is echoed by one round ball nestled amongst a plethora of irregular stones at its base, which serves to punctuate and complete the composition. An exquisite work of art. From another garden in Etobicoke.
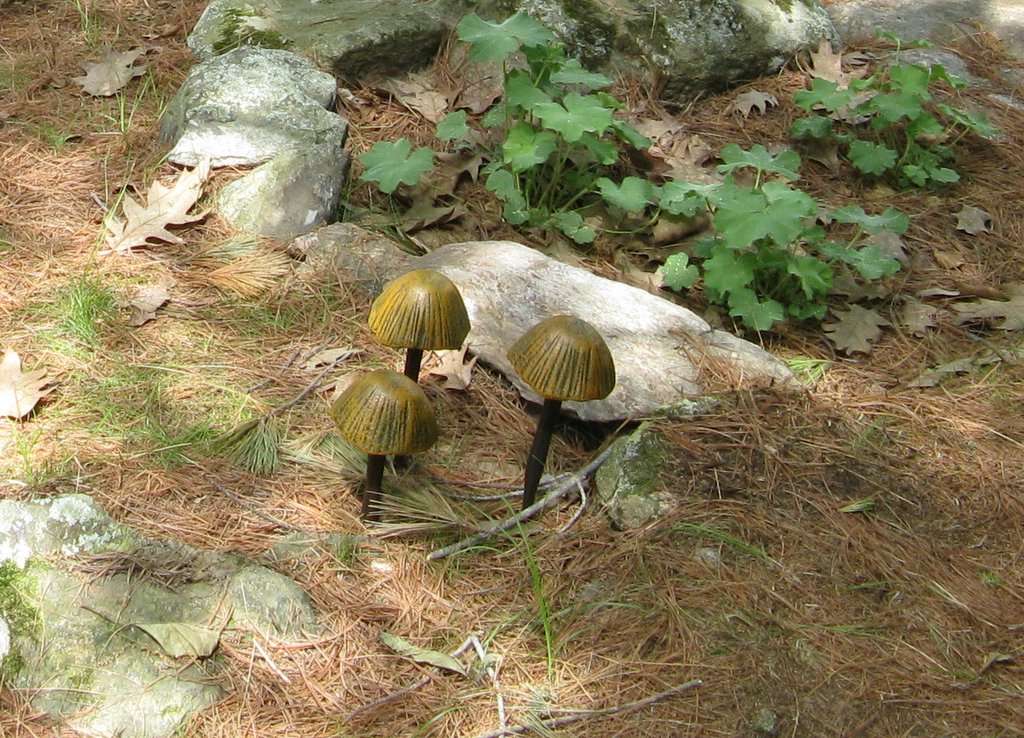
I've tried to gain inspiration for garden ornaments for Kelly Gardens from magazines, garden centres and gardens that I have visited over the year.  I'm a fan of natural ornament myself.  I don't think you will be seeing garden gnomes or pink flamingoes at Kelly Gardens. But natural looking doesn't mean it has to be boring. Have a look at these metal mushrooms we bought this year in Merrickvile at a yarn store (go figure!).

At a distance they look very realistic. But you could give your toe a nasty stub on them if you're not careful.

Last year at the Montreal Botanical garden in their gorgeous catus/succulent house, we spotted a wonderful use of a natural object which was probably placed to add verisimilitude, but it sure did turn out to be decorative too.

Take a look at this.
This bovine skull is playful, and at the same time very fitting. You can almost believe you are in the desert rather than a green house!

When we visited again this Spring, we noticed someone had added a plant in a very clever way.

OK, so it isn't exactly the same skull, but you must admit it's an improvement from the earlier incarnation. Adding the succulent just adds to the playfulness. Bravo!

Wow, I just had to get me one of those!


Meet Geraldine...

Photo op time. We put her under the Sedge just for fun, but I think you'll agree that she looks a lot better with the driftwood in this garden. She comes in for the winter, as our boys think she's really cool, and we wouldn't want her to go astray. (That's a bit of a non-sequiter. Let me explain - Teenage boys think Geraldine is cool, therefore may wish to liberate her. As we visit so rarely, we aren't around to make sure she doesn't get "appropriated".  Therefore, she's being taken in for the winter.)  When we move up eventually, we will keep her out. After all, I'm looking forward to taking her photo when she's covered with snow.

Geraldine in the foreground and the lovely piece of found wood in the background. This bed is planted with echinacea, and blue fescue with some thyme and sage in the corners. I think the driftwood fits perfectly here with Geraldine.

I must admit I find it amusing (which is better than being outraged) at the price of drift wood you can purchase at garden centres. Luckily we have many dead trees at Kelly Gardens, and the ones that have been standing for a long time are oaks. that's an added bonus as the wood is hard and doesn't decay as fast as other woods do.

So, take a piece of dead tree and put it artistically in the garden, and Voila.

I haven't even touched on the whole world of Japanese Garden ornament, which I must admit we have started to acquire, but I'm very pleased with how our first foray into garden ornament has turned out, and the Lanterns will be featured in another post.
 
 
P.S. If anyone knows where we can get a pair of Temple Dogs, we would love to know as they would certainly be spectacular guarding the entrance to Kelly Gardens.

Tuesday, 31 July 2012

Thank you Readers

Recently I have been looking at other bloggers' work, and (dare I say) comparing it to my own.  All I can say is, thank you for coming. Amongst all the competition on the internet, I'm flattered that you make the effort to visit this blog.

There is so much eye-candy out there that I am, on the one hand, impressed by the quality and the beauty of the gardens, and, on the other, depressed, that Kelly Gardens is so young and currently not very photogenic.

And yet, here you are, my faithful readers, still visiting to see what has happened at Kelly Gardens.

A big thanks. And perhaps one day as our garden grows you will be rewarded for your faithful visits with some Kelly Garden's eye-candy. When it grows up.

Saturday, 30 June 2012

Stairway to Heaven Part 3. The Dock Stairway

If you remember, I had promised to continue the Stairway to Heaven post in Stairway 2

Looking down towards the lake. (If you remember, I used to like to sit on these steps and survey the lake).
 If you turn around, you face another set of steps.

Here you can really see the railway-tie step-building technique.

At the top of this stairway (which eventually leads down to the Dock) is one of our first gardening attempts, the Dock Stairway Garden (DSG).  Over the course of 5 years, David has dug out the grasses and debris between the existing rocks, shifting some and maneuvering others to create a pocket where a plant could be tucked.  The DSG is mosty situated to the left of these steps, however, if you look closely you can see a small planting of sempervivums on the right of the steps.

This technique is called "Developing a natural outcrop" (who'd have thought this is an actual technique!), and I will be showing you our progress in the next post.

Thursday, 21 June 2012

Bambi is no longer welcome here

One of the things I love about the area where Kelly Gardens is situated is the abundance of wildlife. I remember when we first used to go up and visit, we'd be hushed and awed when a deer and her fawns came up the drive in the early morning or evening. We'd rush to get the camera and shout in whispers and try not make sudden moves so we wouldn't scare the deer away.

Well, I think I'd scream blue murder now if I saw a deer in my garden. (Does this mean I'm now a real country person?). And I bet you can guess why the change of heart. We have just returned home from our first visit to Kelly Gardens this year. And what did we find?  The deer have used Kelly Gardens as a salad bar.

We really shouldn't have been surprised; after all, we know that deer have regular trails all over our property, we know they get hungry in the spring, and we know that they like to eat. We just didn't expect them to pull up all the adorable miniature Chamaecyparis that we planted last year, decide they didn't really like the taste, and spit them out down the hill! 

Bambi also decimated the Korean Fir, which had weathered a winter and grown a good 6 inches.
Abies Koreana "Horstmanns Silberlocke", planted June 2011
Here's what's left of the Korean Fir after Bambi had finished with it. Picture taken in May 2012.  I wanted to weep.

Here's the Picea orientalis "Tom Thumb" right after it was planted.
At purchase "Tom Thumb" was 7" wide  by 5 1/2" tall (credit, David's data base)
And here it is again after the deer had given it a hair cut. Luckily it is putting out some new growth, which is bright yellow/green.

David is of the opinion that I'm taking this loss far too seriously, and perhaps he has a point. I'll get over it, but meanwhile the fight to foil the deer is on. But I will probably still be in awe when I see the deer in the garden.


P.S. It wasn't all bad news. The deer left many things alone, including the Juniperus communis compressa. This gave us heart, and, more importantly a big clue... Bambi doesn't seem to like Juniper. Let's buy some more!


Juniperus communis compressa 9" tall by 3" wide at planting (May 2011) and very slow growing.
P.P.S. The deer also didn't spot the Japanese Maple, perhaps because it hadn't leafed out yet.
Shhhhh, let's keep that one a big secret.

Monday, 21 May 2012

The Kelly Gardens Sign

David and I visit Kensington Market every Friday after work to do our grocery shopping. We've been going with great regularity for a couple of years now, and the people in the shops we frequent have come to know us.  We like it like that. It's somewhat old fashioned, but we enjoy having the connection of a small community in the midst of the big, anonymous city.

Often we have our supper at  the Tibet Cafe - a restaurant that serves a strange mixture of different foods; we always get the "momos"  - little dumplings filled with meat served in a light broth. Delicious.  It is  here we first saw the art of Sae Kimura, a lovely young artist from Japan who is visiting Canada for an extended stay. I loved her whimsical art and she had a little notice offering to do commissions. She offered to create something if you shared your dreams with her. It wasn't such a large step to think that she might be able to paint a new sign for our garden.

 We met with Sae, and showed her pictures of the lot, and the blog, and described some of the things that made our place special, and she went away and thought about it.

Pines and rocks are common on our lake front
A happy little frog having a rest on the bunkie window
A yellow swallow tail
We get lots of visitors on the bunkie windows.   Considering how voracious the appetite of dragon fly is, it is amazing that we don't fear them.


When we met again, she produced the lid of a metal drum (which she had found) on which to paint the sign - and a few sketches of how she imagined the sign would appear.We liked her proposal, and gave her the thumbs up to go away and create.

I knew she was talented, but little did I suspect she would come up with such a perfect image for Kelly Gardens. We had described some of the wildlife we saw and the many pine trees, and she incorporated all these elements into the sign... and as an added bonus, David and I are also included.

Close up to show detail
When we find a place to hang it, I'll post more pictures with the "Kelly Gardens" sign, in - situ.

Friday, 27 April 2012

Stairway to Heaven - Part 2

We've looked at one set of steps that came with the lot. There is also another set that goes down past the Lake Lookout Garden to the dock.  We call them the Dock Stairs (perhaps if prizes were awarded for imagination we might have put more effort into naming them).  These are also very old, but despite the fact that they are falling apart they are still serviceable.

Here is the base of the dock stairs.

P.S. I'm having a few technical difficulties today, so this post is still to be continued. Rest assured, we'll get to the top of the stairs in another post.

These steps don't exist anymore. They were so rickety, they were removed (much to my chagrin). 
Notice the way that tree seems to be growing in a crack in the rock. It's one of the younger oaks).

Here's a view of the dock stairs from the side. 
Note the lovely big rock in the background. That's where we moved one of the cinder blocks to.


And here's a view of the stairs from the front. It's hard to see, but the steps are made of sawn off lengths of railway ties. There's lots of wild grass (which is probably sedge rather than grass) growing in between, and there have been known to be yellow jackets nesting underneath - makes for exciting journeys up and down the stairs!
Note the shady spot at the top. It's always lovely and cool there and you can sit and survey the lake.

Sunday, 1 April 2012

Stairway to Heaven

If you recall Kelly Gardens is very hilly.  The previous owner was either a bit handy or bit parsimonious, or perhaps a bit of both.  He built lots of things out of scraps that he had probably gotten free. There are benches, stairs and bridges, all of which are in various states of decay.

In the above photo, you can see some benches he made from two cinder blocks with a piece of lumber fastened across the top. He placed 3 of these lovely seats around a fire pit.  The lumber has rotted a bit (not surprisingly since they are probably 25 years old) but they still work, and we moved one of them to overlook the lake. Behind the bench, you can just see one of his staircases in the distance.

A closer look at the staircase from the picture above. As you can see, he just sawed lengths of railway tie and nailed them to strips of wood. You can just see at the bottom the wood has snapped.  They don't look very safe do they?  David tried to fix them, but I don't think they're much better as they aren't even, and as there's no hand rail they are not easy to negotiate. It is remarkably hard to make stairs.

David tries out the new stairs. They certainly look better!
These stairs go down to a little valley that we call the Deer Run (yes, I know I've still got to get that map posted so you can see where all these places are.)  At the top of this set of stairs is a smaller set which are constantly in the shade and have been come beautifully covered in moss.

Notice the little fern that's seeded itself in the gap between steps
This is a delightful location for a planting. We decided that this Japanese Forest Grass, Hakonechloa macra aureola would look splendid here as it tolerates the shade. We ended up planting 3 plants here but only 2 have survived.  Hopefully, as they get older, this grass will end up having a waterfall effect edging the stairs.

To be continued...

Friday, 17 February 2012

If a tree falls in the forest … Part 3. Where does it land?

Choosing plants that will be happy despite neglect, lack of irrigation and animals that would love to have a salad bar grown for their delight is quite a challenge.  One clue as to which plants may do well is to look at what is already growing on your land. 

I am incredibly lucky as there are a variety of habitats on my lot. Broadly speaking, there is the land, the water and the water’s edge – which is sort of in-between.  Wetlands are extremely important to the ecosystem. They are nature’s septic systems, and their job is to catch and filter the water of its impurities before it goes into our lakes and streams.  Fortunately we are beginning to understand the importance of these environmentally and are nurturing them.

One of the loveliest of flowers that thrives on the water’s edge is the Iris versicolor or the blue flag Iris.

Beautiful Iris versicolor at Purdon Conservation Area. They are living in a fen, which differs from a bog as it has water running through it rather than sitting (stagnant).
Further investigation showed that Iris are not a tasty treat for deer so when we came across this Iris siberica "Contrast in Styles" at Burts greenhouse in Odessa, we splurged. 


We knew that this beauty was a marginal and would be happiest in a wetland setting. And as we would not be around to nurture it, we needed to make sure it was sheltered, so we decided to plant it in the wetland between the large island and mainland in a part of the lot we call the Deer Run (I will be uploading a map soon so you can see where all these places are). David cleared a space for it and it was lovingly planted. I whispered a few words of encouragement to it to help it on its way and then we went away for a week, hoping that our lovely Iris would be happy in its new home.

When we came back, this is what we found…

The tree which fell in the forest landed on our newly planted Iris!!!

OK, I know it’s taken a long time to get to the punch line, but I’ve enjoyed the journey, and I hope you have too.

P.S. I’m not sure what has happened to the Iris. We look every time we go, but we can’t say for sure where we planted it (of course we didn't label it) and there are a lot of grassy type plants where it might be. The tree’s still there though…. And my guess is that it will be there for a while.

Friday, 14 October 2011

Be patient, it gets better

Looking at the pictures of those early plantings (which were done in August 2007) from my last posting, I wouldn't be surprised if you (the audience) weren't very impressed.

What were we thinking?  Looking back, I now see our efforts as heartfelt, but the results were a little pathetic. (I think David will probably admonish me for saying that).  Rest assured, it does get better, and to give you a taste of what's to come, I wanted to show you some pictures of that same area where the first picture was taken in my previous post (in which you can see the cabin) over the course of a year.

This photo was taken on September 13, 2010. As you can see the Sempervivum is no more. The spot with the bare earth is where we had started work on the 2010 bed in the Lake Lookout Garden. The firepit is behind the wheelbarrow, and the pile of brush is still there.

September 17, 2010. One week later. You can see we had been hard at work. Looks more like a garden doesn't it! Firepit is still there, but I worked really hard to get rid of the huge pile of brush.

August 22, 2011. One year later. We were busy extending the 2010 bed. I guess we could call it the 2011 bed! You can certainly see how the garden is beginning to develop here. David is taking a well-deserved rest surrounded by all the rocks he's dug out!
Finally, August 25, 2011. We had finished the 2011 bed. Not bad work for a fortnight's hard labour!
So, stick with me. It will be worth it I promise. In the future, I'll be showing more detailed photos of how we sweated to make these quite lovely (in my opinion) gardens a reality.

Thursday, 13 October 2011

Early Plantings

David wants to know when I’m going to stop philosophizing and actually talk about the garden, so here we go.

Our lot is a vacation property, and as long time gardeners we were savvy enough to realize that we had to choose a plant that, once put into the ground, would have to hold its own.  In our area that means, drought tolerance, unappetizing to deer and other critters, and can survive against the natives.

Hmmm, what would fit the bill?  Our first thoughts turned to the Sempervivum family – commonly known as “Chickens and Hens” or "House leeks".  Cold hardy succulents, we thought they might be perfect for our first foray into gardening.  And they weren't a bad choice, by all means. At our local botanical greenhouse our favourite area is the cactus house. It is always fascinating to see the incredible array of weird and wonderful plants that nature has created to survive different environments.

Next step where to plant them?  We still had the problem of not having actual beds, and perhaps this shows how obsessive our need to make a garden was.  We were forced to find a hollow in the rocks that was filled with a thin soil (produced naturally over many years) and some grass or sedge growing in it, dig that out and plant something else there. And that’s what we did. 
I'm not sure you can even see where we planted. It's in the foreground. The cabin is in the background and you can see the firepit is the dark area on the right hand side and the pile of brush collected for the fire is on the left hand side.
Whilst the boys finished the cabins (I have to tell that story one day) I had the task of planting 4 semperviviums that we had purchased.  I don’t remember it taking long. I sort of surveyed the area, tried to find a place where I could dig out the soil with my trowel; pulled out all the grass, and mixed up a little potting soil with the existing soil (it didn’t need much) and bob’s your uncle.
This gives you some idea of what we are digging in to create our garden. The sempervivum is in that outcropping at the top.
 
These sempervivums were unnamed and we not such experts that we could say what they are, except the arachnodium.
Here at the base of the railway tie staircase, I dug out a small cavity between the rocks and planted. This one has survived over the years, mostly because it is sheltered I think.
And the fate of these chicks and hens?  Well, of course the day after, something had dug them up. And next year when we came up to visit, they were completely overgrown with native flora. In fact we had a hard time finding some of them.

Lesson # 6 Actually a bunch of lessons. Firstly, that in order to prevent a critter digging up your newly planted baby, you have to leave the area looking undisturbed. Secondly, that native soil contains a lot of seeds, that can stay viable for many years. Disturbing the soil seems to encourage propogation. So, if you use the native soil, be prepared for lots of weeds.  This is a lesson hard learned.

Saturday, 1 October 2011

A momentous discovery

One of the first things that we planted in our new garden was a gift from a friend. She had a pink rose bush that was far too rampant for her tiny back yard, so she dug it up and presented it to us. It was hard to say no. Perhaps that’s why we end up with plants from other gardeners … we can’t say no.

The poor rose bush was not destined to survive. It spent a week out of the ground waiting for a ride up to our place, and by the time it arrived it had lost most of its leaves. Then we didn’t know where to plant it. Ironic isn’t it?  Almost 5 acres of land and we didn’t know where to plant our first plant.

I must admit that I never thought to question what drives one’s choices in creating a garden.  We have a lovely blank canvas. How do we decide what to plant and where?  Are we driven by location, or plant material, or perhaps a bit of both.  In this case, the plant came first.  We had a rose bush and we had to find a place to plant it.  And this is where we made a momentous discovery. There wasn’t anywhere you could put a spade and find enough earth to plant a rose.  In fact, there was hardly anywhere you could insert a shovel and go deeper than a hand’s breadth before hitting rock.  Oh dear.  We were really unprepared for this.  We didn’t have any soil to make a raised bed (and where would we have put it), and we were in the middle of raising a cabin - which is like raising a barn in miniature - and had more pressing things to think about.

We ended up planting the rose in the first spot that we found (next to a juniper bush) which had enough soil to dig out a hole large enough to plant the rose.  We didn’t have that much hope for the poor thing and we were right to be concerned. When we came back the following morning, some creature had visited in the night and dug it up. It was destined for a woeful end.

Lesson #4 On the Canadian Shield, you have to bring your own soil if you want to make a garden. Oh and be prepared to plant twice.

Note:  In contradiction to my previous post, this was a lovely gift and I would have been very pleased to see it survive in my garden. As it is now deceased and long gone, here's a picture of a rose as it might have been.
Taken at the Toronto Botanical Gardens.

Wednesday, 28 September 2011

In the Beginning was ...

The Lake Lookout from the other side of the lake.

When you have almost 5 acres to plant, it's a daunting task to know where to begin. My only experience up to now is with a suburban garden – fenced, regularly shaped, flat, with a lawn. If you wanted to plant something, you made a bed by removing the sod and perhaps adding some soil and fertilizer and then your plants. I got very good at lifting sod which then went to patch holes in the lawn, or into the composter.

Kelly Gardens is a whole different ball game. There is no lawn. It’s not flat, in fact the previous owner had named the property “Hazell’s Heights” because it is very hilly.
The old sign still exists, though it's on its last legs

Luckily, he had a road put in from the entrance almost to the top of the point – a distance of about 800 feet, and he had built bridges to 2 islands.
Bridge to the small island
Bridge to the  large island

There was a nice clearing where we could camp, a shed, an outhouse, and a couple of fire pits. He’d also built some very makeshift stairways from railway ties and a dock from skids weighted with stones and sunk into the lake.
David in the shed
The outhouse

But he wasn’t a gardener. He and his wife had planted a few of those bright orange day lilies that you see on road sides in July and a couple of spruce trees, which hadn’t really had a chance to grow because of the competition from the native underbrush, but the rest was typical of the Great Lakes – St. Lawrence Forest region.  White Pine, Hemlock, Cedar, Yellow Birch, Sugar Maple, Red Maple, Red and White Oak with an understory of shrubs.
The road through the woods in Fall 2005

Oh, and did I mention the rocks?  Lots and lots of rocks.
A few of the rocks we dug out to build the deck

David and I have had Kelly Gardens since 2005. We’ve planted a few things here and there over the years, but we weren't seriously gardening till 2010. And we really, really wanted to make a garden.  The first few years we learned some valuable lessons, and these early experiments obviously need to be documented because David looked at some pictures of our first plantings and he couldn’t remember them, because they’ve since died.  In order to be able to learn from our mistakes we have to remember them…

Lesson # 2 Keep Records. Make sure you cover the 3 W’s - What, Where, When and take a picture. Next year you may need the picture to locate the plant.